💸Payouts
Send crypto payouts securely. To anyone, anywhere.

Payouts on PayRam let merchants send funds to external wallets across multiple chains in just a few clicks. Whether you’re issuing refunds, employee payroll, or supplier payments, Payouts combine automation, transparency, and control, so you can manage outflows as confidently as you accept inflows.
Why it matters
Managing outgoing crypto payments can be complex, especially when you’re dealing with different tokens and chains. PayRam Payouts simplifies this by giving you a unified control panel for all outgoing transactions.
Operate with precision: Define who can create, approve, and execute payouts to avoid unauthorized transfers.
Save time and cost: Use Payout APIs to automate payments, reducing manual effort and minimizing network fees.
Stay compliant: Maintain full transaction logs and export-ready records for audits and reconciliation.
Expand globally: Send payouts to partners, users, or wallets across supported chains without needing custom integrations.
Reduce risk: Built-in wallet address book ensures you’re sending funds to the right address, every time.
Prerequisites
Before using payouts, make sure your SMTP server is set up. It’s required for sending OTPs as part of the security verification process.
Steps to set up SMTP:
Go to your PayRam Dashboard.
Navigate to Settings → Integrations → Email Servers.
Add your SMTP credentials from your email service provider
Save and test the connection to confirm successful configuration.
How Payram Payout Works
Step 1 : Select Payouts
From the Withdraw menu, select Payouts.
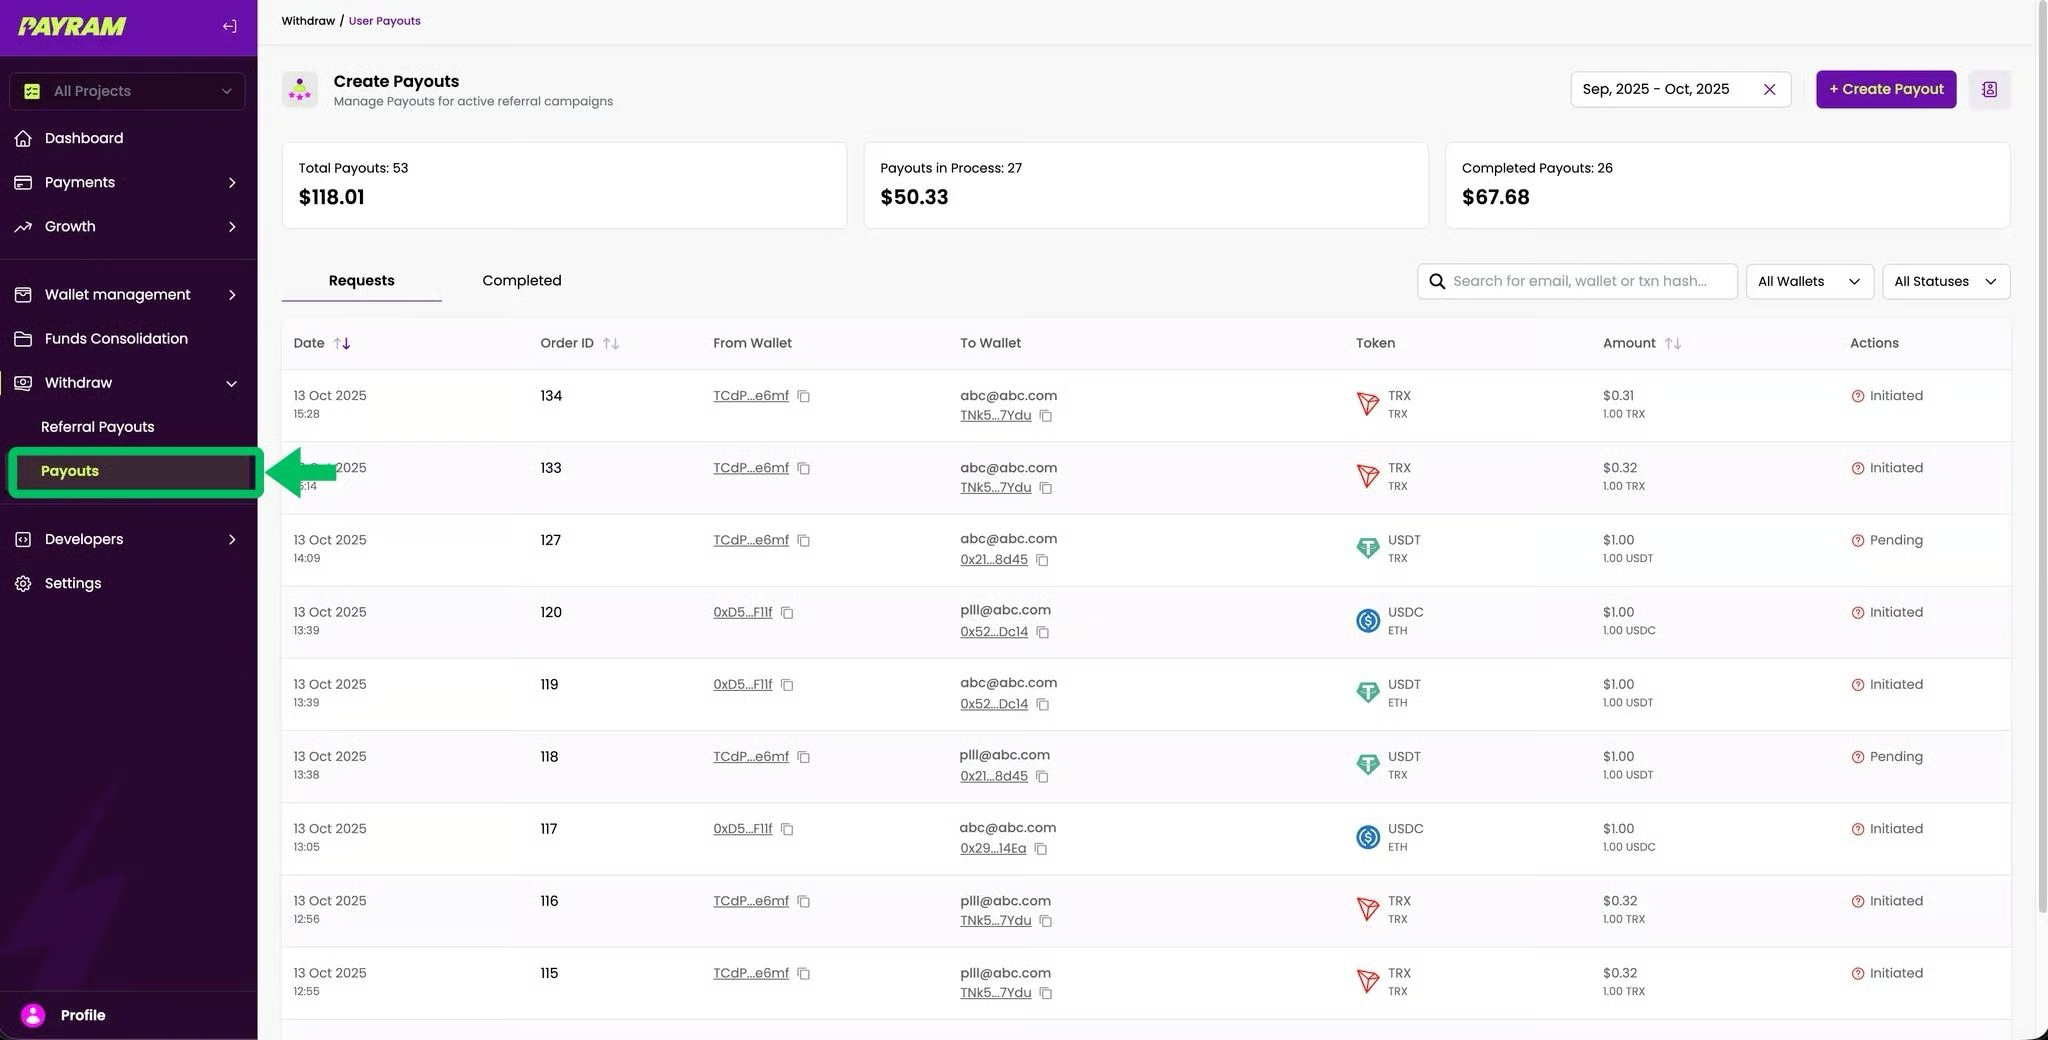
Step 2 : Add Payout Recipient
Before creating a payout, add the recipient to your Address Book. This helps ensure that payouts are sent to the correct wallet address.

Step 3 : Address Book
Click Add New to create a new Address Book.

A pop-up will appear where you can enter the required details. Once saved, this adds the recipient to your PayRam Address Book.
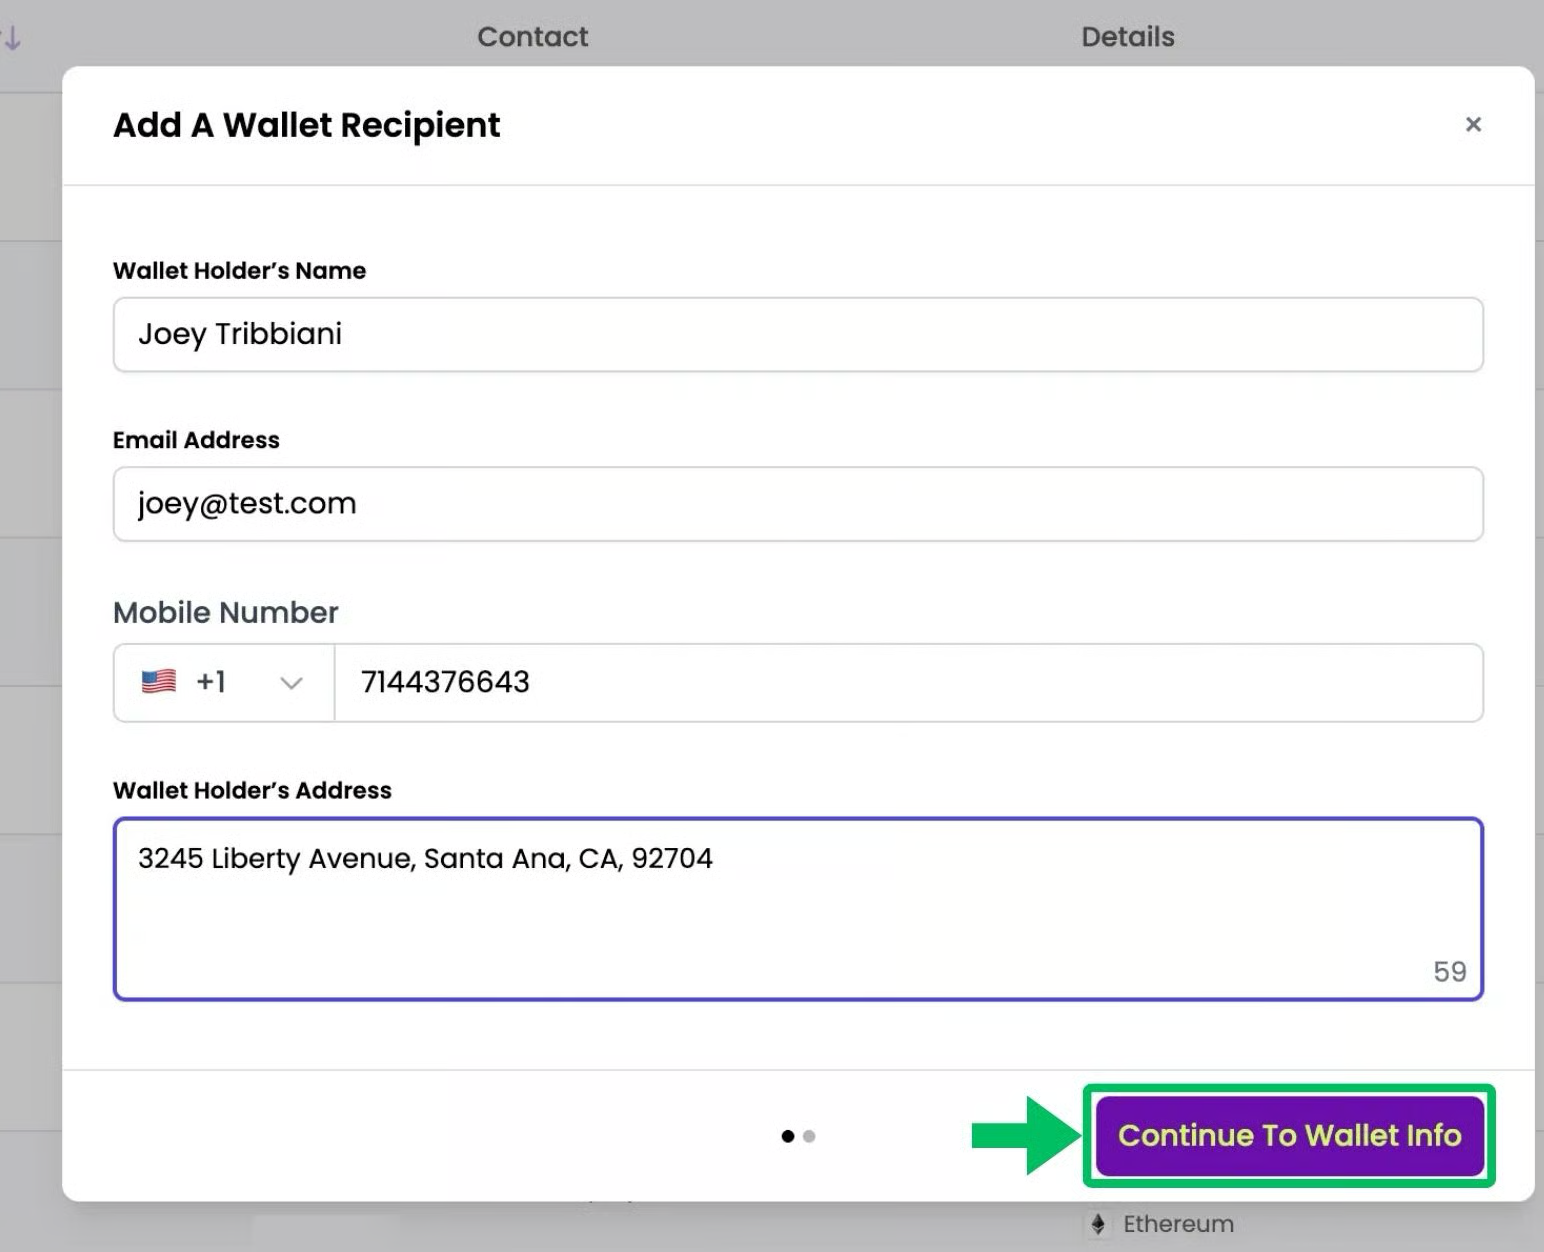
After entering the details, click Continue to Wallet Info. You’ll then be prompted to enter the recipient’s wallet address.
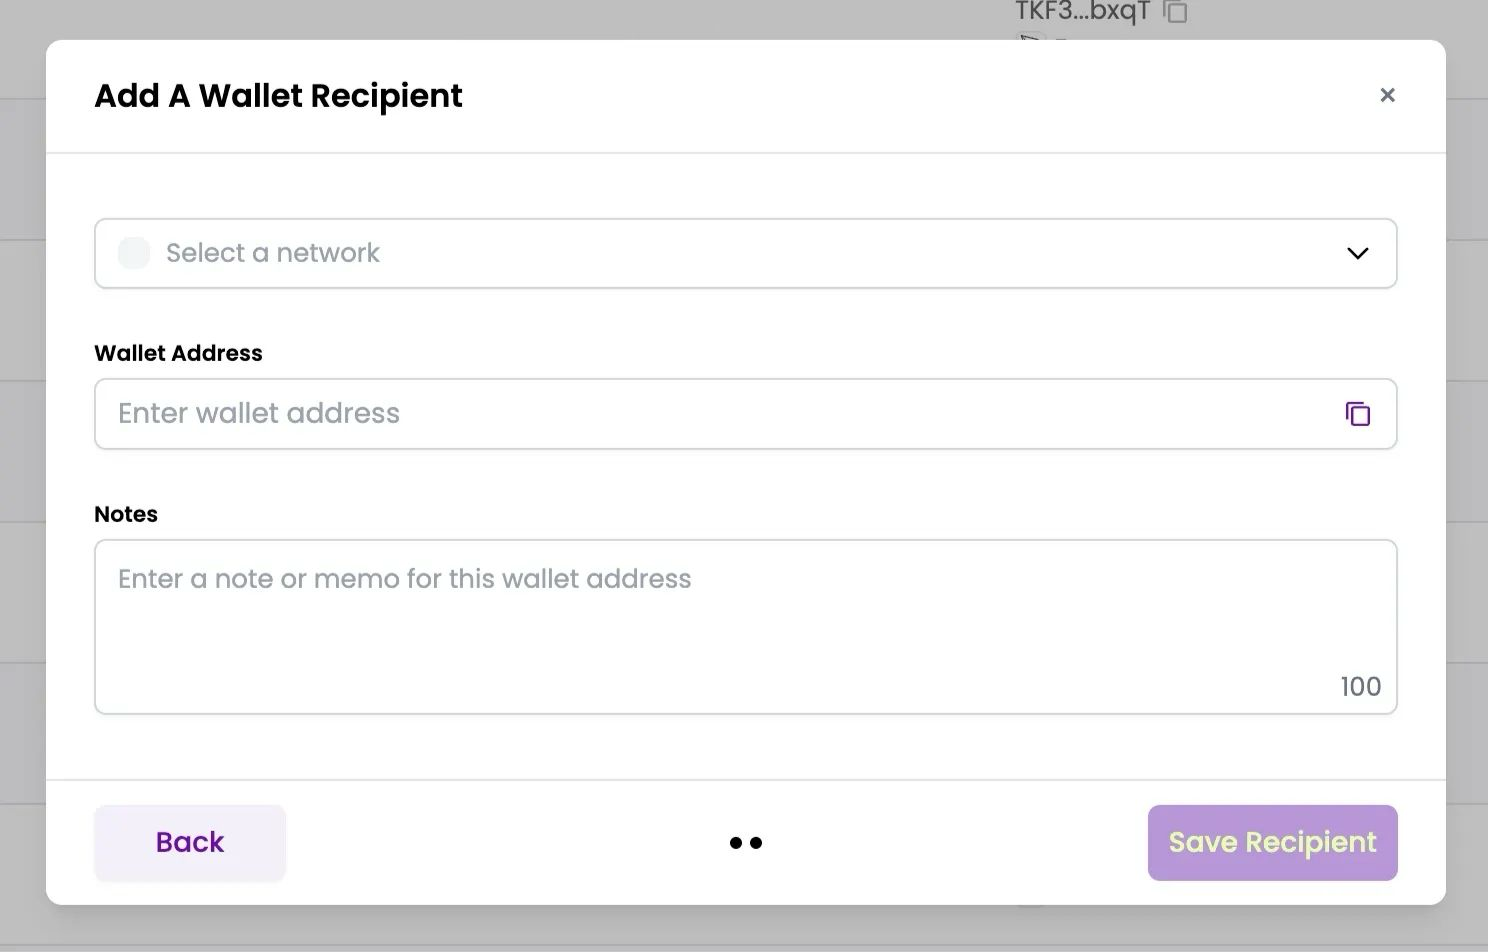
Enter the required details, including the network chain, wallet address, and any optional notes for the recipient.
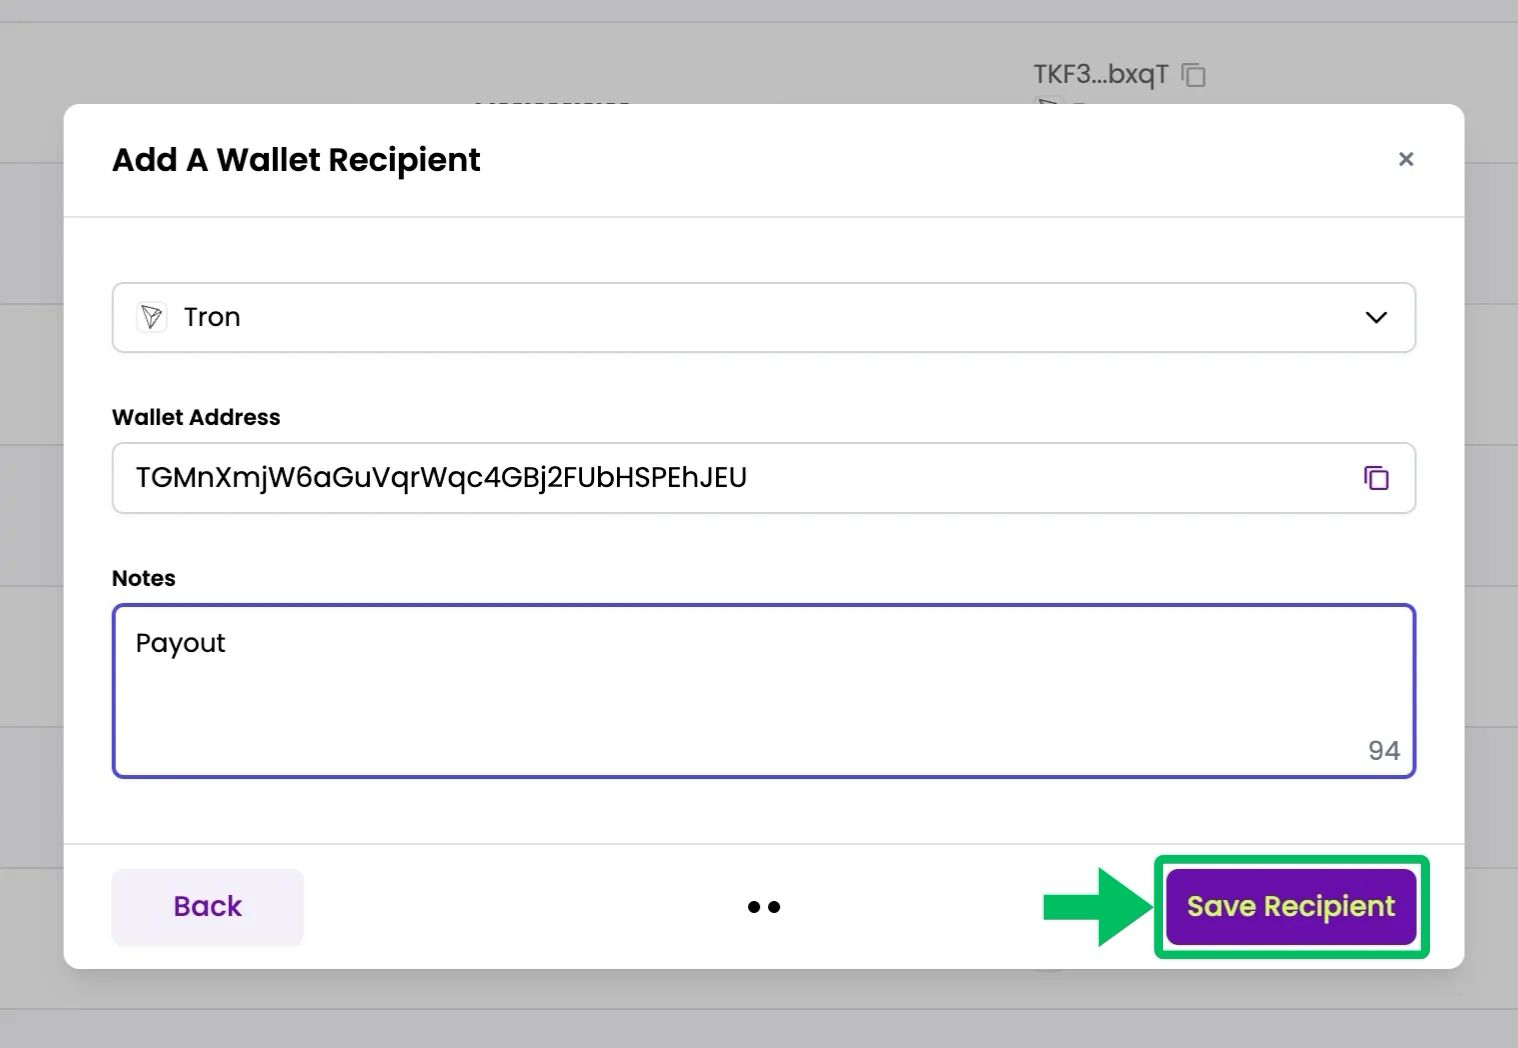
IMPORTANT: Make sure the selected network matches the wallet address. If they belong to different blockchains, the payout will fail and funds may be lost. Always double-check the network before saving the recipient.
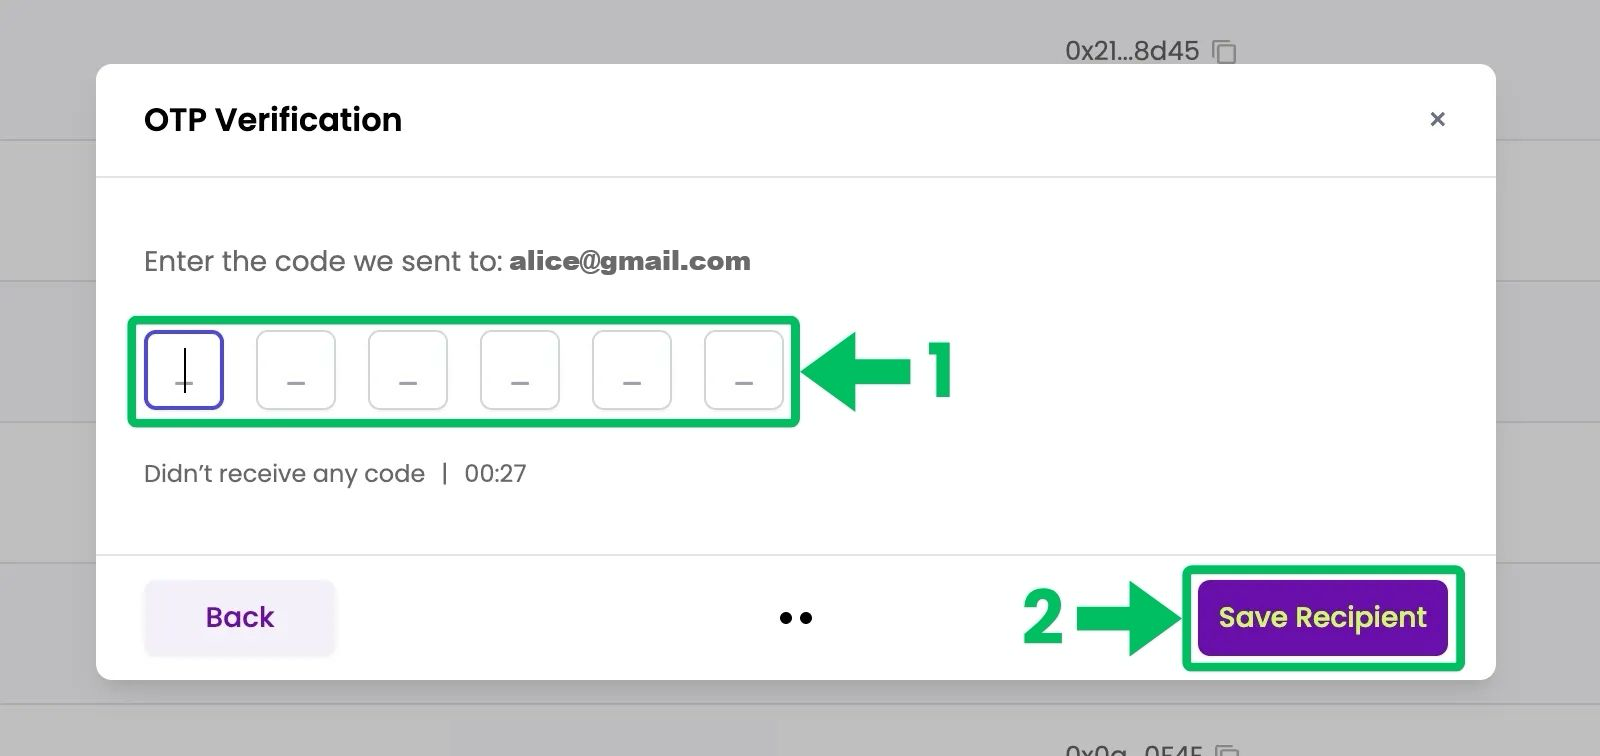
After entering all the details, click Save Recipient. You will be prompted for OTP verification, so make sure your SMTP server is configured in advance.
Step 4 : Create Payout
Click the Back arrow to return to the Create Payout page.

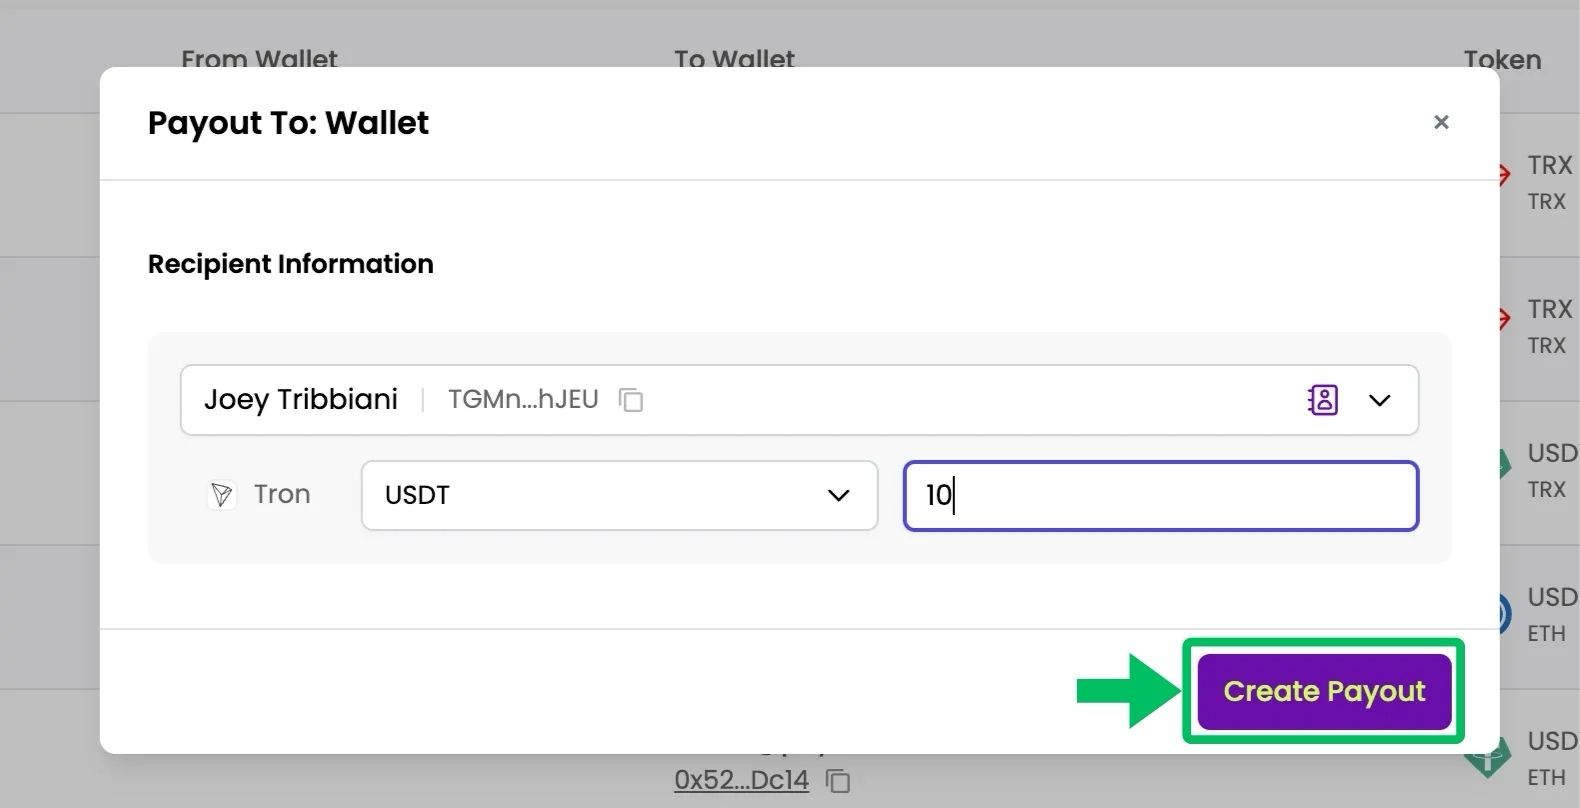
Click Create Payout to start a new payout.
A pop-up will appear where you can enter the required details, select the recipient, and specify the amount.
After entering all the details, click Create Payout to proceed.
Step 5 : Payout Request
You can view the payout request in your Dashboard.

Only Admins can approve payout orders. A payout will not be processed until it has been approved by an Admin.
To enable OTP delivery for payout approvals, configure your SMTP server in the PayRam dashboard.
Note : When a payout is created and sent for approval, the admin receives an OTP for verification. This adds an extra layer of security before the payout is processed.
Approvals are required only for payouts created by non-admin roles.
Common use cases
Payouts are designed to fit real merchant workflows:
Vendor & supplier payments: Pay external wallets in stablecoins or preferred tokens, with automatic confirmation tracking.
Employee or contributor compensation: Handle multi-chain payrolls with approval layers and transparent reporting.
Customer refunds: Issue crypto refunds seamlessly from your dashboard, without manual wallet handling.